http://www.leoshoemaker.com/files/HEXBeam_by_K4KIO.pdf
HEX BEAM
Step 2: The Spreaders
• Fiber glass tubes are recommended for the spreaders. These can be purchased from Max Gain
Systems. Max Gain provides tips for attaching them together. Three thicknesses are needed
1″ O.D., 3/4″ O.D., and 1/2″ O.D. The smaller sizes fit perfectly into the next larger size.
• While it is not necessary, you can spray paint on the spreaders to achieve the color you want.
• Some have tried to build spreaders using PVC but I have heard of no one who has done this successfully. PVC is simply too limber and does not have the “spring tension” needed to maintain the hexagonal beam shape. I recommend against its use for a hexagonal beam.
The thinner pieces slip easily into the next larger pieces for a telescoping structure that will be 136″ long when assembled. Each section is 48″ long. Note the two clamps that tighten the three sections together. You should assemble six such telescoping spreader arms.
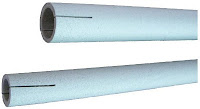
One end of the large and the medium spreaders should be slit about an inch with a hack saw or a jig saw, if available, as shown so that later, when telescoped together the clamp can be slipped over the slits and tightened. An unslit end goes into a slit end.
If you don’t mind a permanent arrangement, you can just glue the sections together with Liquid Nail and then you won’t have to slit the sections and buy the hose clamps to clamp them together.
See more details:
Mark with tape or felt tip pen the initial locations for the wire clamps. These should be as set forth below. These are preliminary and approximate clamp locations.
See more details:
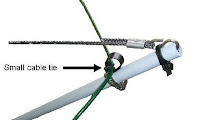
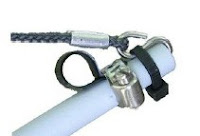
Slip the hose clamps and P clips on now for use in attaching the wires later at the places marked in the preceding photo.
Use the #8 Med clamps on the large section and #6 on the other two sections. Insert P clamps under them for slipping the wires through later. Tighten them only a little as you will be making adjustments later in the assembly stage.
See more details:
 YB Land DX Club DX-ing Is Our Life


